February 2027 is not just another blip on the calendar. It’s a short month packed with opportunities to redefine how you manage your time amidst the whirlwind of daily life.
Mapping Out February 2027: The Basics
First off, February 2027 starts on a Sunday and wraps up on a Sunday too — a neat alignment that gives you perfect week blocks. This precise setup means your weekends line up in a way that’s golden for anyone juggling work and side hustles.
Mark your calendars—the month boasts 28 days, so that no-one forgets it’s not a leap year. Knowing this upfront saves the scramble of day-miscounts when deadlines come knocking.
February 2027 Daily Overview
| Week | Sunday | Monday | Tuesday | Wednesday | Thursday | Friday | Saturday |
|---|---|---|---|---|---|---|---|
| 1 | 1 | 2 | 3 | 4 | 5 | 6 | 7 |
| 2 | 8 | 9 | 10 | 11 | 12 | 13 | 14 |
| 3 | 15 | 16 | 17 | 18 | 19 | 20 | 21 |
| 4 | 22 | 23 | 24 | 25 | 26 | 27 | 28 |
Holidays and Observances You Can’t Miss
While February might seem brief, it punches above its weight when it comes to significance.
- Presidents’ Day falls on Monday, February 16, 2027. It’s federal, so many institutions observe the holiday—a prime day to plan errands that require closed offices or special hours.
- Valentine’s Day is on Sunday, February 14, 2027. Not just hearts and flowers—it’s a cultural staple with big business-backed events. Pro tip: Book early for dining or gifts.
- For the scholars and students, February can include mid-term assessments or breaks depending on regional academic calendars. For instance, Fox Valley Technical College’s official academic calendar offers insight into semester dates around this period.
Print it or Plan it: February 2027 Calendar Resources
Not everyone is glued to digital devices, and that’s okay. Printable calendars are your best friends when it comes to tangible planning and quick reference.

Source: grabcalendar.com
- Find February 2027 calendars that you can download for free. Their layouts vary—from minimalist to detailed planners tailored for multiple uses.
- If you want something instantly printable, check out the printable February calendar formats which enable note-taking and marking appointments by hand.
- For those who want PDF templates with different styles, including weekly or monthly overviews, Calendarpedia offers a comprehensive collection that fits various organizational needs.
Why February 2027 Deserves Better Planning
Think about Chris, the owner of a corner bookstore trying his best to juggle inventory, sales, and community events. February’s short window means every day counts double. If Chris misses a key holiday like Presidents’ Day, he risks losing promotional momentum. For ordinary folks, poor planning can wreck personal or work-related goals before March even rolls around.
The neat Sunday alignment means weekends bookend the month; that’s the perfect setup for either a solid recharge or an extended project push without midweek interruptions.
International and Regional Variations: What to Watch For
February does more than shuffle you around your usual chores. It has regional holidays and observances that might affect your work or social calendar.
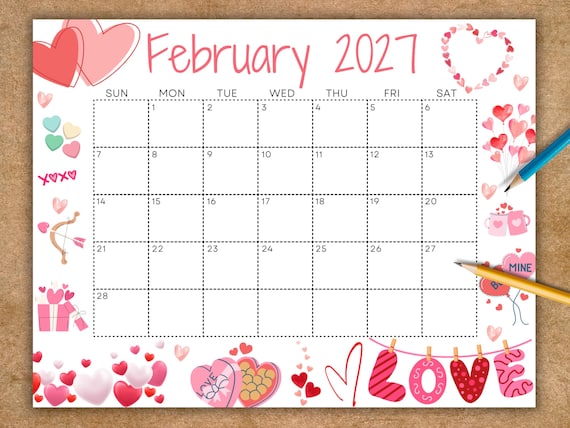
Source: www.etsy.com
- In the United States, as detailed on the Time and Date calendar for the U.S., expect observances like Groundhog Day on February 2, which may be a cultural footnote but still an interesting event for educators and media.
- Certain states might hold additional holidays or school breaks that necessitate checking official state or county calendars for updates. Those can be crucial for parents scheduling childcare or employees planning vacations.
Key Dates at a Glance
| Date | Event |
|---|---|
| February 2, 2027 | Groundhog Day |
| February 14, 2027 | Valentine’s Day |
| February 16, 2027 | Presidents’ Day (Federal Holiday) |

Source: www.calendarpedia.com
FAQ Section
How many days are in February 2027?
February 2027 has 28 days as it is not a leap year. This means no extra day on February 29.
What day of the week does February 2027 start on?
The month begins on a Sunday, which offers a full week cycle starting right off the bat.
Are there any federal holidays in February 2027?
Yes, Presidents’ Day is observed on Monday, February 16, 2027, a federal holiday in the United States.
Where can I find a printable calendar for February 2027?
Several websites offer free printable calendars, including HandyCalendars and GrabCalendar, which provide various formats suited for daily or monthly planning.
Does February 2027 affect academic schedules?
February often coincides with academic breaks or midterms. For example, Fox Valley Technical College’s academic calendar outlines specific session dates around this time, but exact breaks vary by institution.
Disclaimer: All dates and information are based on the most recently available official sources and are subject to change. Always verify with the official institution website for the most current details.